Editing Movies with BB FlashBack
Working with Frames
About frames
Just like a conventional movie you might watch at the theatre or on TV, a FlashBack movie is a series of still frames played in a sequence.BB FlashBack's frame editing functions let you fine-tune the movie by removing sections, adding blank frames to create pauses or tidying up how big changes appear in the movie.
How the framebar
and timeline work
The framebar and
timeline controls allow you to select single or multiple frames, so an edit
function can operate on them. To learn more see The Timeline and Frame bar and Selecting Frames.
Deleting
frames
Use the Delete
frames function to remove mistakes or anything unwanted. See Inserting and deleting frames.
Creating a pause
by inserting frames
Use the Insert
Frames function to create pauses and slow down the action. See Inserting and deleting frames.
Enhancing the
appearance by merging frames
The Merge frames
function merges all the changes in a series of frames into one. This can be
useful in tidying up sections where Windows was slow to display applications or
draw the contents of a window. See Merging
Frames
Selecting frames
The various edit operations operate on either a single frame or a continuous range of frames. For example, Add text will add a text box to a single frame and merge frames combines a range of frames into one.At any time there is one current frame. This is marked in red on the Frame bar and its image is shown in the movie area below.
How to select a single
frame:
Selecting single frames is simple – just click with the left mouse button on
the Framebar or Timeline to display a frame in the movie area and highlight it
in red on the Frame bar.
How to select a range of
frames:
There are 2 ways of selecting a range of frames:-
Hold down the Shift key while clicking the start and end points of the range.
You can click either the framebar or the timeline to define the range in this
way.
- Click the start or end frame in the range and while holding the mouse button down, drag the cursor across the framebar or timeline to define the range

You can include selections in the framebar and soundtracks, so an edit operation acts on the same range across multiple sound tracks and the movie frames.
If your movie includes webcam video, you can also include or exclude that from the selection by clicking the webcam header.

See More about selecting sound and frames.
How to move the start or end
of a range:
Keeping the Shift key pressed down, click on a frame in the Frame bar again.
If the frame you clicked is nearer the start of the range than the end, BB
FlashBack will now make the range start at that frame. Conversely, if the frame
you clicked is nearer to the end of the range, BB FlashBack will now make the
range end at that frame.By keeping the Shift key pressed down and clicking on the Frame bar, you can change the start and end frames of the range.
How to quickly view the start
and end frames of a range:
By holding down the Ctrl key and pressing the left and right arrow keys, the
current frame will switch between the start and end of the range. As usual, the
current frame is highlighted in red on the frame bar and shown in the movie
area.This can be useful when merging a range of frames for example, to make sure that the range starts and ends at exactly the right points.
How to select inactive frames:
If there are a sequence of frames that contain no interesting activity, and
you need to delete, you can use the Select inactive frames function.Select a frame in the inactive sequence, then select the Select inactive frames menu item from the Edit menu. This will select all frames with no keyboard, mouse or screen activity that are adjacent to the current frame.
Inserting and deleting frames
Deleting Frames
To delete frames from a
movie:
-
Select either a single frame or a range of frames. For more help on selecting frames see: Selecting frames.
-
On the Player main menu, select Edit and then Delete Frame(s).On the Edit toolbar click the Delete button:
Or
Note: the Delete function also deletes any
selected sound. For more on selecting sound and frames together see More About Selecting Sound and
Frames.
The insert frame function creates one or more duplicates of the currently selected frame. The effect of this is to create a pause in the movie, which could be used (for example) to ensure that specific events are synchronised with the appearance and disappearance of text boxes.
To insert a frame into a movie
-
Select a single frame.
-
On the Player main menu, select Edit and then Insert Frame(s).On the Edit toolbar click the Insert Frames button:
Or
-
In the Insert Frame(s) window input the number of new frames to insert or the length of the pause in 1/1000ths of a second and click ‘Ok’. The duplicate frames will be inserted after the selected frame.
Note: if you insert a pause at a point where a
sound is playing, you will be given a choice of either inserting silence into
the sound (to keep it in sync with later events in the movie) or leaving the
sound unchanged. You indicate this with the 'Insert silence into sound track'
checkbox.
Merging Frames
The merge frames function can be useful in tidying up the appearance of a movie.
An example of how to use the Merge frames
function:
An application is recorded starting up, which comprises many separate,
complex windows. In the movie, the individual windows do not seem to appear at
the same moment, but are visibly drawn separately, across a number of frames.
To improve the appearance of the movie and have all the windows appear together in just one frame, you could merge the range of frames that starts just before the first of the windows appears and ends just after the last one is fully drawn. Merging means that all of these frames get combined into one, and the windows all appear together.
Merging does not affect the
overall length of the movie. All of the merged frames appear identically in the
resulting movie.
How to merge a range of frames:
-
Select a range of frames. For more help on selecting frames see Selecting frames.
-
On the Player main menu, select Edit and then Merge Frames.
or
On the Edit toolbar, click the Merge Frames button:
Cropping frames
BB FlashBack includes a function to remove all but the selected frames from the movie.
How to crop the movie down to only the selected
frames:
-
Select the range of frames that you want the movie to consist of.
-
On the Player main menu, select Cropping frames from the Edit menu.
or
On the Edit toolbar, select the
button.
Frame rates
The frame rate of a movie can be set using the Properties dialog. This frame rate is used in normal playback and is used as the default when exporting movies.
How to set the frame rate of a movie:-
In Player, select the Properties item from the File menu.
-
On the Frame Rate tab set the frame rate value appropriately. The default is 25 frames per second. There may be occasions when you wish to reduce this value to improve playback on lower spec PCs.
-
Annotating Movies
Adding Text boxesBB FlashBack Player can add text boxes to a movie during editing, so that you can add comments on a particular event.
How to add a text box:
-
Select the frame where you want to add a text box.
-
On the Player main menu, select Text from the Insert menu.or
On the Edit toolbar, click the Insert Text button:
-
On the Text box properties window type the words you want to appear, select the style of the text, the box it appears in, and the length of time you want the text box to appear in the movie.
How to edit the properties of
a text box:
There are a number of ways to show the Text Box properties window for a
particular text box.-
Double-click the text box itself, in the movie area.
or -
Click the text box in the movie area. A blue line will appear around the box to indicate it is selected. Then either select Text box properties from the Edit menu, or click the
 button on the Edit toolbar.
or
-
Double-click on the frame in the Frame bar that contains the A image to indicate the appearance of that text box.
Once the Text Box properties
window is visible, the text content and style can be altered.
For more help on this window see The Text Box properties
window.
Changing text box duration
Text boxes only appear in the movie for a set length of time – the duration
that was set in step 3 above on the Text box
properties window.In the Frame bar you will see A image in the frame where you added the text box and a
 image in the frame where it is hidden. These mark the
start and end of its appearance in the movie.
image in the frame where it is hidden. These mark the
start and end of its appearance in the movie. You can change its duration by setting it in the Text box properties window, or by clicking and dragging the A and
icons in the frame bar
- you have to click, hold for a second and then drag.How to move a text box:With the mouse over the text box in the BB FlashBack Player movie area, hold down the left mouse button. The Cursor will turn into a
 shape and, keeping the left mouse button held down, you can drag the
text box around the movie area to a new position.
shape and, keeping the left mouse button held down, you can drag the
text box around the movie area to a new position.Alternatively, the Position tab of the Text Box properties window allows you to enter the co-ordinates of the top left corner of the box.
How to resize a text box:This is done in the same manner as resizing a normal window. In the BB FlashBack Player movie area, move the mouse cursor over a corner or side of the text box – the cursor will change shape to indicate that you can drag that side or corner to resize the box.
Alternatively, the Position tab of the Text Box properties window allows you to enter the width and height of the text box in pixels.
-
Select the text box by clicking it.
-
On the Player main menu, select Edit and then Delete text.or
On the Edit toolbar, click the Delete object button:
Pausing the movie at a text box
Movie playback can be automatically paused when a text box appears, giving the viewer time to read the contents of a text box before allowing the movie to continue. To enable this feature for a particular text box, bring up the text box properties window and check the checkbox titled ‘Pause the movie at this text box…’.The Text Box properties window
The text box properties window is used to change the text shown in a text box, the style in which it is drawn, the style of the enclosing box and whether the movie will pause at that box during playback.
-
Properties. Enter the text to appear in the text box in the Text entry field. The font used and style of the box can be set using the controls on this tab. See Text box styles below for more information on styles.
The length of time that the box will appear
during the movie is entered in the Text
Duration entry field.
If you want movie playback to pause when this
text box appears, check the Pause movie at this
text box… checkbox.
-
Styles. Allows you to save the current look of the textbox as a 'style' that you can apply to other textboxes.
-
Background. The controls on this tab determine the colour of the text box background and border. You can set the box to have a gradient fill - a transition between two colours - from top to bottom or left to right.
-
Position. This tab contains controls for the exact positioning of the text box. The pixel position of the top left corner, and the width and height of the box can be entered.
-
Shadow. Select 'draw shadow' to have the text box cast a shadow over the movie below. Set the colour, size and opacity of the shadow using the controls on this tab.
-
Transitions. Have the textbox fade in and out by setting the duration of its transitions.
Text box
styles
When you have a combination of text box
properties - the colour, text size, font etc. - that you like and want
to use again, you can save these properties as a style. Then you can apply this
style to any other text box in any of your movies, to get the same
appearance.
How to save a style:
-
Get the text box properties as you want them.
-
On the Properties tab of the Text box properties window, click the Save current style button.
-
Enter a style name and click OK.
BB FlashBack creates a style with the name you
entered. The style name will now appear in the Select text box style drop down list whenever
you edit a text box, in any of your movies.
To apply this style to a text box, just select
the style name from the Select text box
style drop down list.
The size and position of a text box is not saved
in the style.
Adding Images
BB FlashBack can display images in the movie area.
How to add an image file to a movie:
-
On the Frame bar, select the frame where you want to add an image.
-
On the Player main menu, select Image from the Insert menu.On the Edit toolbar, click the Insert image button:
or
-
Click on the 'Load Image' button to select an image file. Valid formats are: .jpg .png .bmp .gif .emf .wmf or .ico files.
-
Double-click the image in the movie area.
or -
Click the image in the movie area. A blue line
will appear around it to indicate it is selected. Then either click the button on the Edit toolbar or select Image Properties from the Edit menu.
or
-
Double-click on the frame in the Frame bar that contains the
 icon to indicate the appearance of that
image.
icon to indicate the appearance of that
image.
The Image properties window
allows you to change:
-
Size and Position. The image can be sized as required, to stretch or shrink the original image.
-
Opacity. Sets the opacity of the entire image.
-
Transparent colour. You can select to have one colour in the image as transparent: i.e. that colour will not be drawn, and the movie area below will be visible through that pixels of the image that contain the colour. The 24 bit PNG and 32 bit (ARGB) BMP image formats can include alpha channel (transparency) information, so you can select to use that instead of setting a transparent colour.
-
Duration of display. The image can either be displayed for a set period of time or the movie can pause when it is displayed.
-
Transitions. Have the image fade in and out by setting the duration of its transitions.
How to move an image:
With the mouse over the image box in the movie area, hold down the left mouse
button. The Cursor will turn into a 
shape and you can drag the text box around the movie area to a new
position.
Alternatively, the position can be set via the Image properties dialog.
How to change how long the image is displayed
for:
You can either:-
Change the duration in the Image properties window
or
-
In the framebar, click and drag theicons that signify the start and end frames of an image - you have to click and hold down for a second, then drag.
 and
and 
and
How to delete an image:
- Select the Image by clicking it on the movie area.
- On the Player main menu,
select Edit and then
Delete Image.
or
On the Edit toolbar, click the Delete Object button:
Adding Highlights
BB FlashBack Player can add highlights to a movie during editing, to draw attention to an area of the movie.
How to add a highlight:
-
Select the frame where you want to add a highlight box.
-
On the Player main menu, select Highlight from the Insert menu.
or
On the Player toolbar, click the Highlight button
-
In the Insert Highlight window, three tabs allow the highlight to be
customized.
-
General tab - type the Name of the
highlight; select the Shape of the highlighted area, its Fill Colour and Outline
Colour.
You can also choose the thickness of the highlight in pixels, its opacity and duration up to a maximum of 1 second. The duration can also be set to pause the movie until the mouse button is clicked.
-
Position tab – the Position tab allows
you to enter the co-ordinates of the top left corner of the highlight.
- Transitions tab – have the highlight fade in and out by setting the duration of its transitions.
-
General tab - type the Name of the
highlight; select the Shape of the highlighted area, its Fill Colour and Outline
Colour.
image in the frame where you added the highlight.
Further highlights can be added to the Frame bar by right clicking the time line
and selecting Insert Highlight.In the toolbar, the Jump to dropdown menu allows you to jump straight to a highlight.
How to edit the properties of a highlight:
There are a number of ways to show the highlight properties window for a
particular highlight.-
Double-click the highlighted area itself.
or
- Right click the highlight in the movie area and select Properties.
Highlights can also be layered in front of or behind other elements on the screen by right clicking over a highlight and selecting the 'bring forwards' and 'send backwards' type options from the menu.
How to move a highlight:
The highlight appears by default at the top left of the recorded screen.
Click the highlight and hold the mouse button down to drag it anywhere in the
movie area.Alternatively, the Position tab of the Image Insert properties window allows you to enter the co-ordinates of the top left corner of the highlight.
How to resize a highlight:
Put the cursor at the edge of the highlight. It will turn into a
resize cursor, and you can click and drag to resize the highlight.Alternatively click the Position tab in the Image Insert window and entering the width and height of the highlight in pixels.
How to change how
long the highlight is displayed for:
You can either:-
Change the duration in the Highlight properties window
or
- In the framebar, click and drag the
 and
and  icons that signify the
start and end frames of the highlight - you have to click and hold down for a
second, then drag.
icons that signify the
start and end frames of the highlight - you have to click and hold down for a
second, then drag.
How to delete a highlight:
-
Select the highlight by clicking it.
-
On the Player main menu, select Edit and then Delete
highlight.
or
Right click the mouse over the highlight and select Delete.
Pausing the movie at a highlight
Movie playback can be automatically paused when a highlight appears, giving
the viewer time to view the highlighted area before allowing the movie to
continue. To enable this feature for a particular highlight, bring up the Image Insert window and check the checkbox titled ‘Pause movie until mouse clicked…’
Adding ButtonsButton objects are interactive objects that allow you to open a web page, jump to any point in the movie, start or stop playback.
How to add a button:
-
Select the frame where you want to add a button.
-
On the Player main menu, select Button from the Insert menu.or
On the Edit toolbar, click the Insert Button button:
-
On the Button properties window:
-
Type the button caption.
-
Select the style of the text and the button background
-
The length of time it should be displayed.
-
The action. Available actions are:
-
Stop playback
-
Start playback
-
Open a URL. Enter address of the webpage, with or without the "http://" prefix. When the button is clicked, the web address will open in the default web browser.
-
Jump to a point in the movie. You can jump to a frame number, marker or an object, such as a textbox, image, highlight, sound or button.
-
Execute Javascript. You can enter javascript that will be executed when the button is clicked. Note that the javascript will not be executed when playing the movie in BB FlashBack Player. It is only executed by the Flash export of the movie.
There is a 400 character limit for the javascript code, but if you need to execute something more complex than this will allow, you can make calls to functions in the webpage that embeds the Flash export.
-
-
How to change how
long the button is displayed for:
You can either:-
Change the duration in the Button properties window
or
-
In the framebar, click and drag the
 and
and  icons that signify the start and end frames of a button
- you have to click and hold down for a second, then drag.
icons that signify the start and end frames of a button
- you have to click and hold down for a second, then drag.
Adding Arrows
BB FlashBack can add Arrows to the movie, to help focus attention on a detail.
How to add an Arrow:-
Select the frame where you want to add an arrow.
-
On the Player main menu, select Arrow from the Insert menu.
or
On the Player toolbar, click the Arrow button
Changing the Arrow appearanceTo change the properties of an Arrow you can either:
-
Double-click the Arrow.
or
Right click the Arrow and select Properties.
-
Properties
Settings here enable you to change:
-
The shape at the start and end of the arrow
-
The width of the tail and head
-
Its opacity
- How long it is displayed for
-
The shape at the start and end of the arrow
-
Appearance
Settings here enable you to change:
-
The fill type (lineart or gradient) and colour
-
The border appearance
- The shadow appearance
-
The fill type (lineart or gradient) and colour
-
Position
Settings in this tab enable you to change the position and size of the arrow.
-
Transitions
Here you set how the arrow fades in and out.
Changing the arrow position and sizeTo move the arrow, click and drag its center. To change the position of the tail or head, click and drag the tail or head. To make the arrow wider or narrower, change the 'Width' property on the Properties tab of its Properties window.
How to delete an Arrow:Select the arrow by clicking it.
On the Player main menu, select Edit and then Delete Arrow.
or
Right click the selected arrow and select Delete.
Adding a Watermark
BB FlashBack allows you to add a watermark image to a movie. This image remains with the position and size you set for the duration of the movie.
Note:The watermark cannot change its size and position during the movie.
How to add a watermark-
In the Insert menu, select Watermark.
- Select an image file
Adding a Blur Effect
BB Flashback can add a blur effect to obscure details in the movie. You might use this to obscure sensitive details in a form.
How to add a Blur effect:-
Select the frame where you want to add the blur.
-
On the Player main menu, select Blur from the Insert menu.
or
On the Player toolbar, click the Blur button
-
Select the frame where you want to add an arrow.
Using the GalleryBB FlashBack enables you to easily reuse textboxes, images and other objects by adding them to the Gallery. Once in the Gallery, they can be added to any movie just by dragging them in.
How to add an Object to the Gallery-
You can hold down the Ctrl key and drag the object into the Gallery.
or
- Right click on the object and select "Add to Gallery" from the menu.
How to copy an object from the Gallery to the movie-
Drag the object from the Gallery into the movie.
or
- Right click the object in the Gallery and select 'Add to Movie'.
You can edit an object in the gallery by double clicking it.
You can remove an object from the gallery by right clicking it and selecting 'Delete' from the menu.
-
You can hold down the Ctrl key and drag the object into the Gallery.
Zoom-Pan Effects
About Zoom-Pan EffectsBB FlashBack allows you to "zoom in" to any area of the movie, to more clearly show what's happening on screen.
On this page:
-
Select the frame where you want the zoom effect to occur.
-
Click the Add Zoom-Pan button
 on the toolbar.
 -
On the Zoom-Pan properties dialog, select 'Custom Area' and click OK.
-
You'll see a green rectangle on the movie area. This marks the area that the movie will zoom into. Or to put it another way, whatever is in the green rectangle will expand to fill the entire movie area.
The green rectangle will look like this:

You can move the green rectangle by clicking and dragging on the
handle at the top left corner. Resize it by dragging an edge or corner.
Click the 'Apply Effects' button on the toolbar to see how the movie will look when exported.
When effects are applied, you see no green rectangle.
Click the Apply Effects button again to turn effects off and see the green rectangle that enables you to change the area the movie will zoom into.
When you add a Zoom-Pan effect, this changes the view for all frames that follow it in the movie. Select any frame after the effect, with Apply Effects set to on, and you'll see the green rectangle that indicates the displayed area of the movie.
Changing the position or size of the green rectangle in any frame changes the view for all frames affected by that Zoom-Pan effect - you don't need to find the frame where you originally added the effect in order to change it.
-
 Find the Zoom-Pan effect in the framebar. The easy way to do this is by selecting the effect in the Jump To control on the toolbars, to jump straight to its frame.You should see something like this in the framebar:
The
icon indicates the end frame of the transition - where the Zoom-Pan ends.
The icon indicates the start frame of the transition -
where the Zoom-Pan starts.
icon indicates the start frame of the transition -
where the Zoom-Pan starts.
-
Right click theor icon and select"'Delete Zoom/Pan"
Click the Delete Zoom-Pan button
in the toolbar
-
Find the Zoom-Pan effect in the framebar. The easy way to do this is by
selecting the effect in the Jump To control on the toolbars, to jump straight to
its frame.
You should see something like this in the framebar:
The icon indicates the start frame of the transition -
where the Zoom-Pan starts.
The icon indicates the end frame of the transition - where
the Zoom-Pan ends.
-
Drag either the or the icons in the framebar to move the start and end of the
transition.
or
Double click the icon to see the Zoom-Pan effect properties
window.
When you add a Zoom-Pan effect, this changes the view for all subsequent frames in the movie. If you zoom in, then want to zoom back out later, to show the entire movie, you need to add a second Zoom-Pan effect.
To zoom back out and show the entire movie:
-
Find the frame where you want to zoom out.
-
Click the Add Zoom-Pan button
 on the toolbar.
 - On the Zoom-Pan properties window, select "Entire movie" for the Show Area setting. Click OK.
Cropping and Autoscrolling
About cropping
After recording a movie, you may only wish to show a part of the recorded area in the final movie.
Use BB FlashBack's cropping function to cut down the movie to a smaller area and have it automatically scroll to keep the mouse in view.
How to crop a movie:
-
Open the movie in BB FlashBack Player and click the cropping button
 to turn cropping 'on'.
Or, select "Set Cropping Rectangle" from the Effects menu.
-
You will see a blue rectangle that indicates the size the movie will be
cropped down to.
Resize and position it as required.
again.
How to preview the cropped movie:
-
Click the Apply Effects button on the toolbar, or select the "Apply Effects"
item from the Effects menu.
Note: the Apply Effects function also applies any Zoom-Pan effects you've added - it shows exactly what you will get when you export the movie (apart from any scaling or other effects you add at export time).
Autoscrolling Cropped Movies
The crop rectangle can follow the mouse to keep it in view. Use options in
the Effects -> Autoscroll Cropping Rectangle menu to have the mouse either in
the center or near the center of the movie.When autoscrolling is set on the cropping rectangle, any ZoomPan effects you add can only be resized, not moved, because they will also be automatically positioned to keep the mouse in view.
Making Cropping Permanent
To decrease the size of the FlashBack movie file (.FBR file) you can make
cropping 'permanent', effectively throwing away everything outside of the
cropping area.To do this: on the Effects menu, select "Make Cropping Permanent".
The Mouse Cursor
Highlighting the mouse cursorBy default, BB FlashBack draws a yellow highlight circle around the mouse cursor. If you want to change the colour, opacity, size and outlining of this circle, or not show it at all, use the Highlight Cursor option in the Effects menu.
Note: if you use the 'cursor trails' option in Windows, the highlight circle will not be visible.
Smoothing mouse movements
BB FlashBack enables you to smooth out the mouse movements in selected frames.
The mouse will move smoothly from its position in the first frame of the selection to its position in the last frame of the selection, stopping to make any clicks it needs to along the way.
Use this feature to remove any distracting jumps in mouse movements.
How to smooth mouse movements in a section of the
movie:
-
Select the frames in which you want to smooth out the mouse movements. BB
FlashBack will make the mouse move smoothly from the position in the first frame
of the selection to its position in the last frame of the selection.
- Select the 'Smooth cursor movements' item from the Actions -> Cursor menu.
Hiding the mouse cursor
BB FlashBack can hide the mouse cursor during playback. You can select a series of frames and choose to hide the cursor in those frames when the movie is played back.
How to hide the mouse cursor:
-
Select the frames in which you want to hide the mouse.
-
In the Actions menu, select Mouse Cursor
-> Hide the mouse cursor
- The selected frames will be drawn in blue in the frame bar, indicating that the mouse is hidden in those frames.
Mouse action animations
When a mouse button is pressed during recording, BB FlashBack can show an animation in the final movie, to indicate the action that occurred. These animations can be customised by editing the bitmaps used to create them.
How to switch mouse action animations on and
off:
In the Effects menu, select Highlight Cursor. Then select or deselect the
"Highlight mouse clicks" setting.
How to use the default animations instead of
customised animations saved in a movie file:
If you play back an FBR file with customised mouse animations but want to use
the default animations or your own customised images, select the Reset mouse action images item from the Edit menu in BB FlashBack Player.
How to customise mouse action animations:
The images used in animations are contained in the "custom" folder, which is
in the BB FlashBack install folder. When Player starts, it loads these images.
Take a look in this folder and you will see a number of .PNG image files called
LeftMouseDblClk1.png, LeftMouseDown1.png etc.When a mouse action occurs in the movie, BB FlashBack overlays these images onto the mouse cursor in a sequence to create the animation. For example, if the right mouse button was pushed down, it would overlay RightMouseDown1.png, then RightMouseDown2.png, then RightMouseDown3.png to create the animation effect.
To change the animation seen for a mouse action, you simply need to change the image files used.
When you change the animations, your customised version is saved into the movie (FBR) file and also included in all exports you make.
For example: if you wanted to change the right mouse down animation, you could edit the 3 files called RightMouseDown1.png, RightMouseDown2.png and RightMouseDown3.png in an image editor application to create a completely different effect. Each of the images must be the same size.
Supported formats for the image files are: BMP, GIF, PNG, JPG, JPEG and ICO.
If you wanted to use BMP files instead of PNG files for the right mouse down animation, you would remove the RightMouseDown<frame number>.PNG files from the Custom folder and replace them with RightMouseDown<frame number>.BMP files.
The actions available for animation are:
-
Left button down
-
Left button up
-
Left button double click
-
Right button down
-
Right button up
-
Right button double click
-
Middle button down
-
Middle button up
-
Middle button double click
-
Scroll wheel up
- Scroll wheel down
No default animation is supplied for middle button actions.
Transparency
The animation images need transparency, or they would completely obscure the
mouse pointer and the movie around it. BB FlashBack handles transparency in the
images in one of two ways: -
By treating one colour in the image as 'transparent'
The transparent colour is set by the TransparentColour variable in the custom.cfg file - see the section More advanced customisation below. If you use normal BMP, GIF, JPG or 8 bit PNG images you must use this method and specify a colour as 'transparent'.
-
By using transparency information encoded into the image.
This is only available for 32bit 'ARGB' BMP files and 24bit PNG format images. 24bit PNG images can be saved by Adobe Photoshop and other image processing applications.
More advanced customisation
In the custom folder is another file, custom.cfg which holds details on how
Player will use the animation images. It is a text file and you can edit this to
change the number of frames of animation, speed of animation and the transparent
colour in the image files.The file holds a number of numeric values which relate to the various mouse action animations. You can change these values to change the animation.
Here is a sample set of lines from custom.cfg which control the left button down animation. Comments on how you could change the value are on the right.
|
LeftMouseDownDoDraw=1
|
Change this value to 0 to not include this particular animation (left button down) in the movie - no animation will be displayed. |
|
LeftMouseDownImagesCount=3
|
Change this to add more frames of animation or have less. Remember, if you changed this value to 4, for example, you would need to add an extra image file: LeftMouseDown4.bmp |
|
LeftMouseDownDuration=500
|
The time in milliseconds that each frame of the animation is displayed for. |
|
LeftMouseDownOffsetFromCursorHotspotX=-12
LeftMouseDownOffsetFromCursorHotspotY=-12
|
These two values specify the position of the 'hotspot' in the image - the
position of the end of the cursor. To locate the animation exactly over the end of the mouse cursor, you may need to change these values. |
|
LeftMouseDownTransparentColor=0x00FF00FF
|
The colour in the image that will be made transparent when it is overlaid on top of the movie. |
Putting the mouse in front or behind other objects
By default the mouse cursor will move behind other objects, like textboxes, images and highlights, that you add to the movie.
You may want the mouse cursor to move in front of them, so they appear to be part of the original recording. BB FlashBack allows you to do this.
Note: the exception to this is the webcam video window - this always appears in front of the cursor and other objects added in BB FlashBack.
How to make the cursor move in front of other
presentation objects:
- Select the 'Bring cursor to front' item from the Actions -> Cursor menu.
Re-recording the mouse cursor
There may be occasions when you want to tidy up or correct mouse movements in the movie. BB FlashBack allows you to do this by letting you re-record the mouse for part or all of the movie.
How to re-record the mouse for a section of the
movie:
-
Select the frames in which you want to re-record the mouse.
-
Select the menu item Actions ->
Cursor -> Re-record mouse cursor -> At selected frames. A countdown will be
displayed, to allow you to get the mouse into the correct starting position.
- When the count down finishes, the movie will play. Move the mouse as you wish it to be seen in the final movie and BB FlashBack will record the movements.
Removing Insactive Sections
Removing Inactive SectionsBB FlashBack allows you to select or delete sections of the movie where there is nothing of interest happening.
Defining Inactivity
First you need to define what is regarded as an 'inactive' section. Go to Actions -> Select Inactivity -> Define Inactivity. On this window you can define 'inactivity' as the absence of annotations, mouse movement or key presses, and how long the absence needs to last before it is regarded as 'inactivity'.
Selecting Inactivity
Use the Select Next Inactive Section
and Select Previous Inactive Section
menu items in the Actions -> Select
Inactivity menu (or use the shortcut keys: Ctrl-N and Ctrl-P) to select
the next or previous inactive sections from the current frame.
Deleting Inactivity
Use the Delete all Inactive Sections
menu item on the Actions -> Select
Inactivity menu to delete all inactive sections from the movie. Using Markers in Movies
Using Markers in moviesBB FlashBack places no limits on the size of the movies you can create. Though practically you are restricted by the amount of free disk space available to your PC, you can easily create movies that span many minutes, possibly hours.
If there are particular events in a large movie that you need to be able to view again and again, finding them could prove to be a tiresome operation.
To enable fast access to different points in a movie, BB FlashBack Player lets you add markers. Markers are simply a way of labeling a particular frame, so that you can easily find it later.
How to add
or delete a marker:
Markers are added with the Marker item on the Insert menu.
They are deleted by either:
-
Going to the Markers -> Delete sub menu from the Edit menu, and selecting the marker you wish to delete.
or
-
In the framebar, right clicking on the frame containing the marker and selecting Delete Marker.
How to move to a marker or see
the list of markers:
The top items in the Edit ->
Marker sub menu are a list of the markers in the current movie. Selecting
one of these will jump straight to the frame that contains the marker.You can also see the markers listed in the Jump To dropdown list in the Player toolbar.
When viewing the movie in the Player you can move forwards or backwards through marked frames by using the Next marker and Prev marker items on the Movie menu.
Inserting Video Files
Inserting Video FilesBB FlashBack can insert a video file into a screen recording.
Note: this may greatly increase the size of the FBR file.
How to insert a video file into a Flash Back
movie
-
On the main menu, select Insert then 'Video File'
-
Select a video file.
-
Select how it will be sized to the FlashBack movie
- Set the 'in' and 'out' transitions (see this page for more about Transitions)
Pauses
Pauses
You can pause the movie at any frame by adding a Pause object. A Pause object will pause playback for a set period of time or until the mouse is clicked. Sounds do not play while the movie is paused.
How to add a pause object:
-
Select the frame you want to add the pause to.
- In the Insert menu, select Pause.
How to change the settings of a Pause Object
Double click the pause object icon in the framebar to show its settings
window.
Pausing while a textbox, image or other object is
displayed
In the 'Duration' settings for a textbox, image or other in-movie object, you
can set the movie to pause while the object is displayed. This will create a
pause object in the same frame as the in-movie object. You can set the duration
of this pause either from the 'Duration' settings of the in-movie object it was
created by, or by double clicking the pause object icon in the framebar.Note: Other objects that start in the same frame will be unable to set their duration - they will take the same duration as the object with the linked pause object.
Displaying a 'Click to continue' image while the
movie is paused
If you select the 'Pause until mouse clicked' option for the pause, you can
also select the "Show 'paused' graphic while movie is paused". The default pause
graphic appears in the top left corner of the movie and says "Paused: click to
continue". See the help below if you want to change the appearance or position
of the pause graphic.
How to change the pause
graphic:
-
On the Player main menu select Pause Graphic -> Set Pause Graphics from the Edit menu.
-
Select a bitmap file.
To revert back to the default pause image, select Pause Graphic -> Set Default Pause Graphics from the Edit menu.
How to change the position of
the pause graphic:
-
On the Player main menu select Pause Graphic -> Set Pause Graphics Position from the Edit menu. The pause graphic will appear in the movie area.
-
Use the mouse cursor to position the pause graphic. When you are satisfied with its position, leave it and carry on with any other editing operations.
Start and End Titles
You can add 'Titles' to the start and end of a movie. Titles are text and/or an image on top of a plain colour background.
Note: When BB FlashBack adds titles, it adds a number of highlight, textbox, pause and image objects to the start or end of the movie. You can edit these objects manually to change the text or image position, but for altering the duration of the titles, it is simpler to use the 'Start/End Titles' window.
How to add Titles
-
Select 'Start/End Titles' on the Effects menu or click thebutton on the toolbar

- Set the Title properties - give it some text and/or an image
Changing the Titles
Appearance
To change the position of the text or image:
When BB FlashBack adds titles with text and images, it creates the text or
image by adding a standard textbox or image object to the movie. You will see
these at the start or end of the movie. Change the position of the text or image by clicking and dragging the textbox or image object, as you normally would.
To change the size of the image:
See the help for 'To change the position of the text or image'. Change the
size of the image object added by BB FlashBack when it created the titles.
To change anything else:
Select 'Start/End Titles' from the Effects menu or click the button on the toolbar
and change the title properties.You can always alter the titles by editing the image, textbox, pause and highlight objects added by BB FlashBack to the start or end of the movie. However, for things like altering the duration of the movie, it is much easier to use the Titles properties window.
Displaying Invisible Keystrokes
Some keypresses, such as function keys or the Insert, Delete, Home and End keys, often do not produce visible output. If you want the user to know when these 'invisible' keys are being pressed, BB FlashBack can automatically create textboxes to show them.
How to show invisible keystrokes:
-
Select 'Show Invisible Keystrokes' from the Effects -> Display Invisible
Keystrokes menu.
- Set properties for the textboxes that will show the keystrokes.
To hide invisible keystrokes, select 'Hide Invisible Keystrokes' from the Effects -> Display Invisible Keystrokes menu. This will delete all textboxes created by 'Show Invisible Keystrokes'.
Transitions
BB FlashBack can add 'transition' effects to a movie to provide a more visually appealing transition from one part of a movie to the next. They can be added automatically when inserting a video file or FlashBack movie to cover the 'joins' at the start and end of the inserted movie.
When you insert a transition at a frame, it creates a transition between that frame and the frame before it.
You can set the type of transition, its duration and whether it pauses in the middle. The 3 types of transition are:
-
Fade to white - if you add the transition at frame 100, for example, frame 99
will fade to white and frame 100 will fade in from white.
-
Fade to black - again, frame 99 fades to black and frame 100 fades in from
black
- Cross-fade - this fades frame 99 into frame 100
How to add a Transition
-
Find the frame in the movie that contains the 'join' you want to have
transition smoothly.
-
Select the Transition menu item in
the Insert menu or click the
 button on the toolbar.
- Set the Transition properties
Transition Frames
When you add a Transition, it looks like this on the framebar: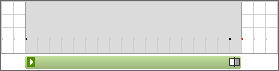
The grey frames are part of the Transition and cannot be edited like normal frames. They cannot be deleted without deleting the Transition. You cannot insert objects in these frames or perform other editing operations on them.